<?xml version="1.0" encoding="utf-8"?><feed xmlns="http://www.w3.org/2005/Atom" xml:lang="en"><generator uri="https://jekyllrb.com/" version="4.4.1">Jekyll</generator><link href="https://blog.formshive.com/feed.xml" rel="self" type="application/atom+xml" /><link href="https://blog.formshive.com/" rel="alternate" type="text/html" hreflang="en" /><updated>2026-03-28T22:35:05+00:00</updated><id>https://blog.formshive.com/feed.xml</id><title type="html">Formshive Blog</title><subtitle>Stay updated with the latest Formshive features, tutorials, and form processing insights. Learn how to build better forms and streamline your workflows.</subtitle><author><name>Formshive Team</name><email>hello@formshive.com</email></author><entry><title type="html">How Formshive Protects Your Data Behind the Scenes</title><link href="https://blog.formshive.com/posts/how-formshive-protects-your-data/" rel="alternate" type="text/html" title="How Formshive Protects Your Data Behind the Scenes" /><published>2026-03-28T00:00:00+00:00</published><updated>2026-03-28T00:00:00+00:00</updated><id>https://blog.formshive.com/posts/how-formshive-protects-your-data</id><content type="html" xml:base="https://blog.formshive.com/posts/how-formshive-protects-your-data/"><![CDATA[<p>TL;DR: Beyond encryption and 2FA, Formshive has a number of security practices baked in that protect you and your users — from hashing IP addresses to running its own captcha, to never storing passwords at all.</p>

<h2 id="your-ip-address-is-hashed-before-its-stored">Your IP Address Is Hashed Before It’s Stored</h2>

<p>When someone submits a form, Formshive records some metadata for analytics — device type, browser, rough location. But the IP address itself is SHA-256 hashed before it ever hits the database.</p>

<p>That means we can detect patterns (like repeated submissions from the same source), but we can’t look up someone’s actual IP address after the fact. It’s a one-way operation. Even if the database were compromised, there’s no list of real IP addresses to leak.</p>

<h2 id="no-third-party-captcha">No Third-Party Captcha</h2>

<p>Most form services use Google reCAPTCHA. That means every time someone fills out your form, Google gets a request too — with all the tracking that comes with it.</p>

<p>Formshive uses ALTCHA instead. It’s a self-hosted, proof-of-work captcha that runs entirely on our infrastructure. No external requests, no tracking pixels, no data shared with third parties. Your visitors solve a computational challenge that’s verified server-side using HMAC-SHA256 signatures — and that’s it.</p>

<h2 id="no-passwords-to-steal">No Passwords to Steal</h2>

<p>Formshive doesn’t have a password database. You sign in through Google, GitHub, Microsoft, or Nostr — providers that handle authentication with their own security teams, 2FA infrastructure, and breach monitoring.</p>

<p>There’s no password reset flow, no “we stored your password in plaintext” incident waiting to happen, no credential stuffing attack surface. If you want an extra layer of protection, you can enable <a href="/posts/march-release/">two-factor authentication</a> on top.</p>

<h2 id="spam-detection-without-outsourcing-your-data">Spam Detection Without Outsourcing Your Data</h2>

<p>Spam filtering usually means sending your form data to a third-party API for analysis. Formshive handles it locally with two mechanisms:</p>

<ul>
  <li><strong>Email reputation tracking</strong>: If a specific email address has submitted forms before and most of those were flagged as spam, new submissions from that address are automatically flagged.</li>
  <li><strong>Bayesian text analysis</strong>: A built-in classifier evaluates the content of submissions against learned spam patterns. No external API calls, no data leaves the server.</li>
</ul>

<p>Both run on our infrastructure. Your form submissions aren’t being fed to someone else’s machine learning pipeline.</p>

<h2 id="file-urls-expire">File URLs Expire</h2>

<p>When someone uploads a file through your form, it’s stored securely in a private S3 bucket. You can access it through the dashboard or email notifications, but the download link is a signed URL that expires after 7 days.</p>

<p>That means even if a link leaks — forwarded email, shared screenshot — it won’t work forever. After a week, it’s dead. You can always generate a fresh link from the dashboard.</p>

<h2 id="api-keys-have-scopes-and-budgets">API Keys Have Scopes and Budgets</h2>

<p>If you use the API, you can create keys that only have access to what they need. A key for reading form submissions doesn’t need write access. A key for a specific integration doesn’t need access to your billing.</p>

<p>Each key also has a budget — a spending limit that caps how much it can do. If a key is compromised, the damage is bounded.</p>

<h2 id="immutable-audit-logs">Immutable Audit Logs</h2>

<p>Every significant action in your account — logins, configuration changes, data access, billing events — is logged to an append-only audit trail. Old entries are purged automatically after the retention period.</p>

<p>If something looks off, you can trace exactly what happened, when, and from where.</p>

<h2 id="built-with-rust">Built With Rust</h2>

<p>Formshive’s backend is written in Rust. For users, the practical upside is that an entire category of security vulnerabilities — buffer overflows, use-after-free, null pointer dereferences — simply can’t happen. The language eliminates them at compile time.</p>

<p>This isn’t a silver bullet, but it removes the most common attack vectors that have led to major breaches in software written in C, C++, or other memory-unsafe languages.</p>

<h2 id="encryption-is-still-the-big-one">Encryption Is Still the Big One</h2>

<p>We covered <a href="/posts/january-release-encryption/">encryption modes in detail</a> back in January. The short version: you can choose between no encryption, server-side encryption (we protect it, we can read it), or public-key encryption via Nostr (only you can read it). The mode is locked once set — it can’t be downgraded later.</p>

<hr />

<p>None of these features require you to configure anything. They’re just how Formshive works.</p>]]></content><author><name>Franz Geffke</name></author><category term="Use Cases" /><category term="security" /><category term="privacy" /><category term="features" /><summary type="html"><![CDATA[TL;DR: Beyond encryption and 2FA, Formshive has a number of security practices baked in that protect you and your users — from hashing IP addresses to running its own captcha, to never storing passwords at all.]]></summary></entry><entry><title type="html">March Release: AI Form Assistant, Two-Factor Authentication, and Issue Tracking</title><link href="https://blog.formshive.com/posts/march-release/" rel="alternate" type="text/html" title="March Release: AI Form Assistant, Two-Factor Authentication, and Issue Tracking" /><published>2026-03-23T00:00:00+00:00</published><updated>2026-03-23T00:00:00+00:00</updated><id>https://blog.formshive.com/posts/march-release</id><content type="html" xml:base="https://blog.formshive.com/posts/march-release/"><![CDATA[<p>TL;DR: The form editor now has a built-in AI assistant that answers your questions in real time. You can protect your account with two-factor authentication. And a new Issues page shows you exactly what’s going wrong with your forms.</p>

<h2 id="ai-form-assistant">AI Form Assistant</h2>

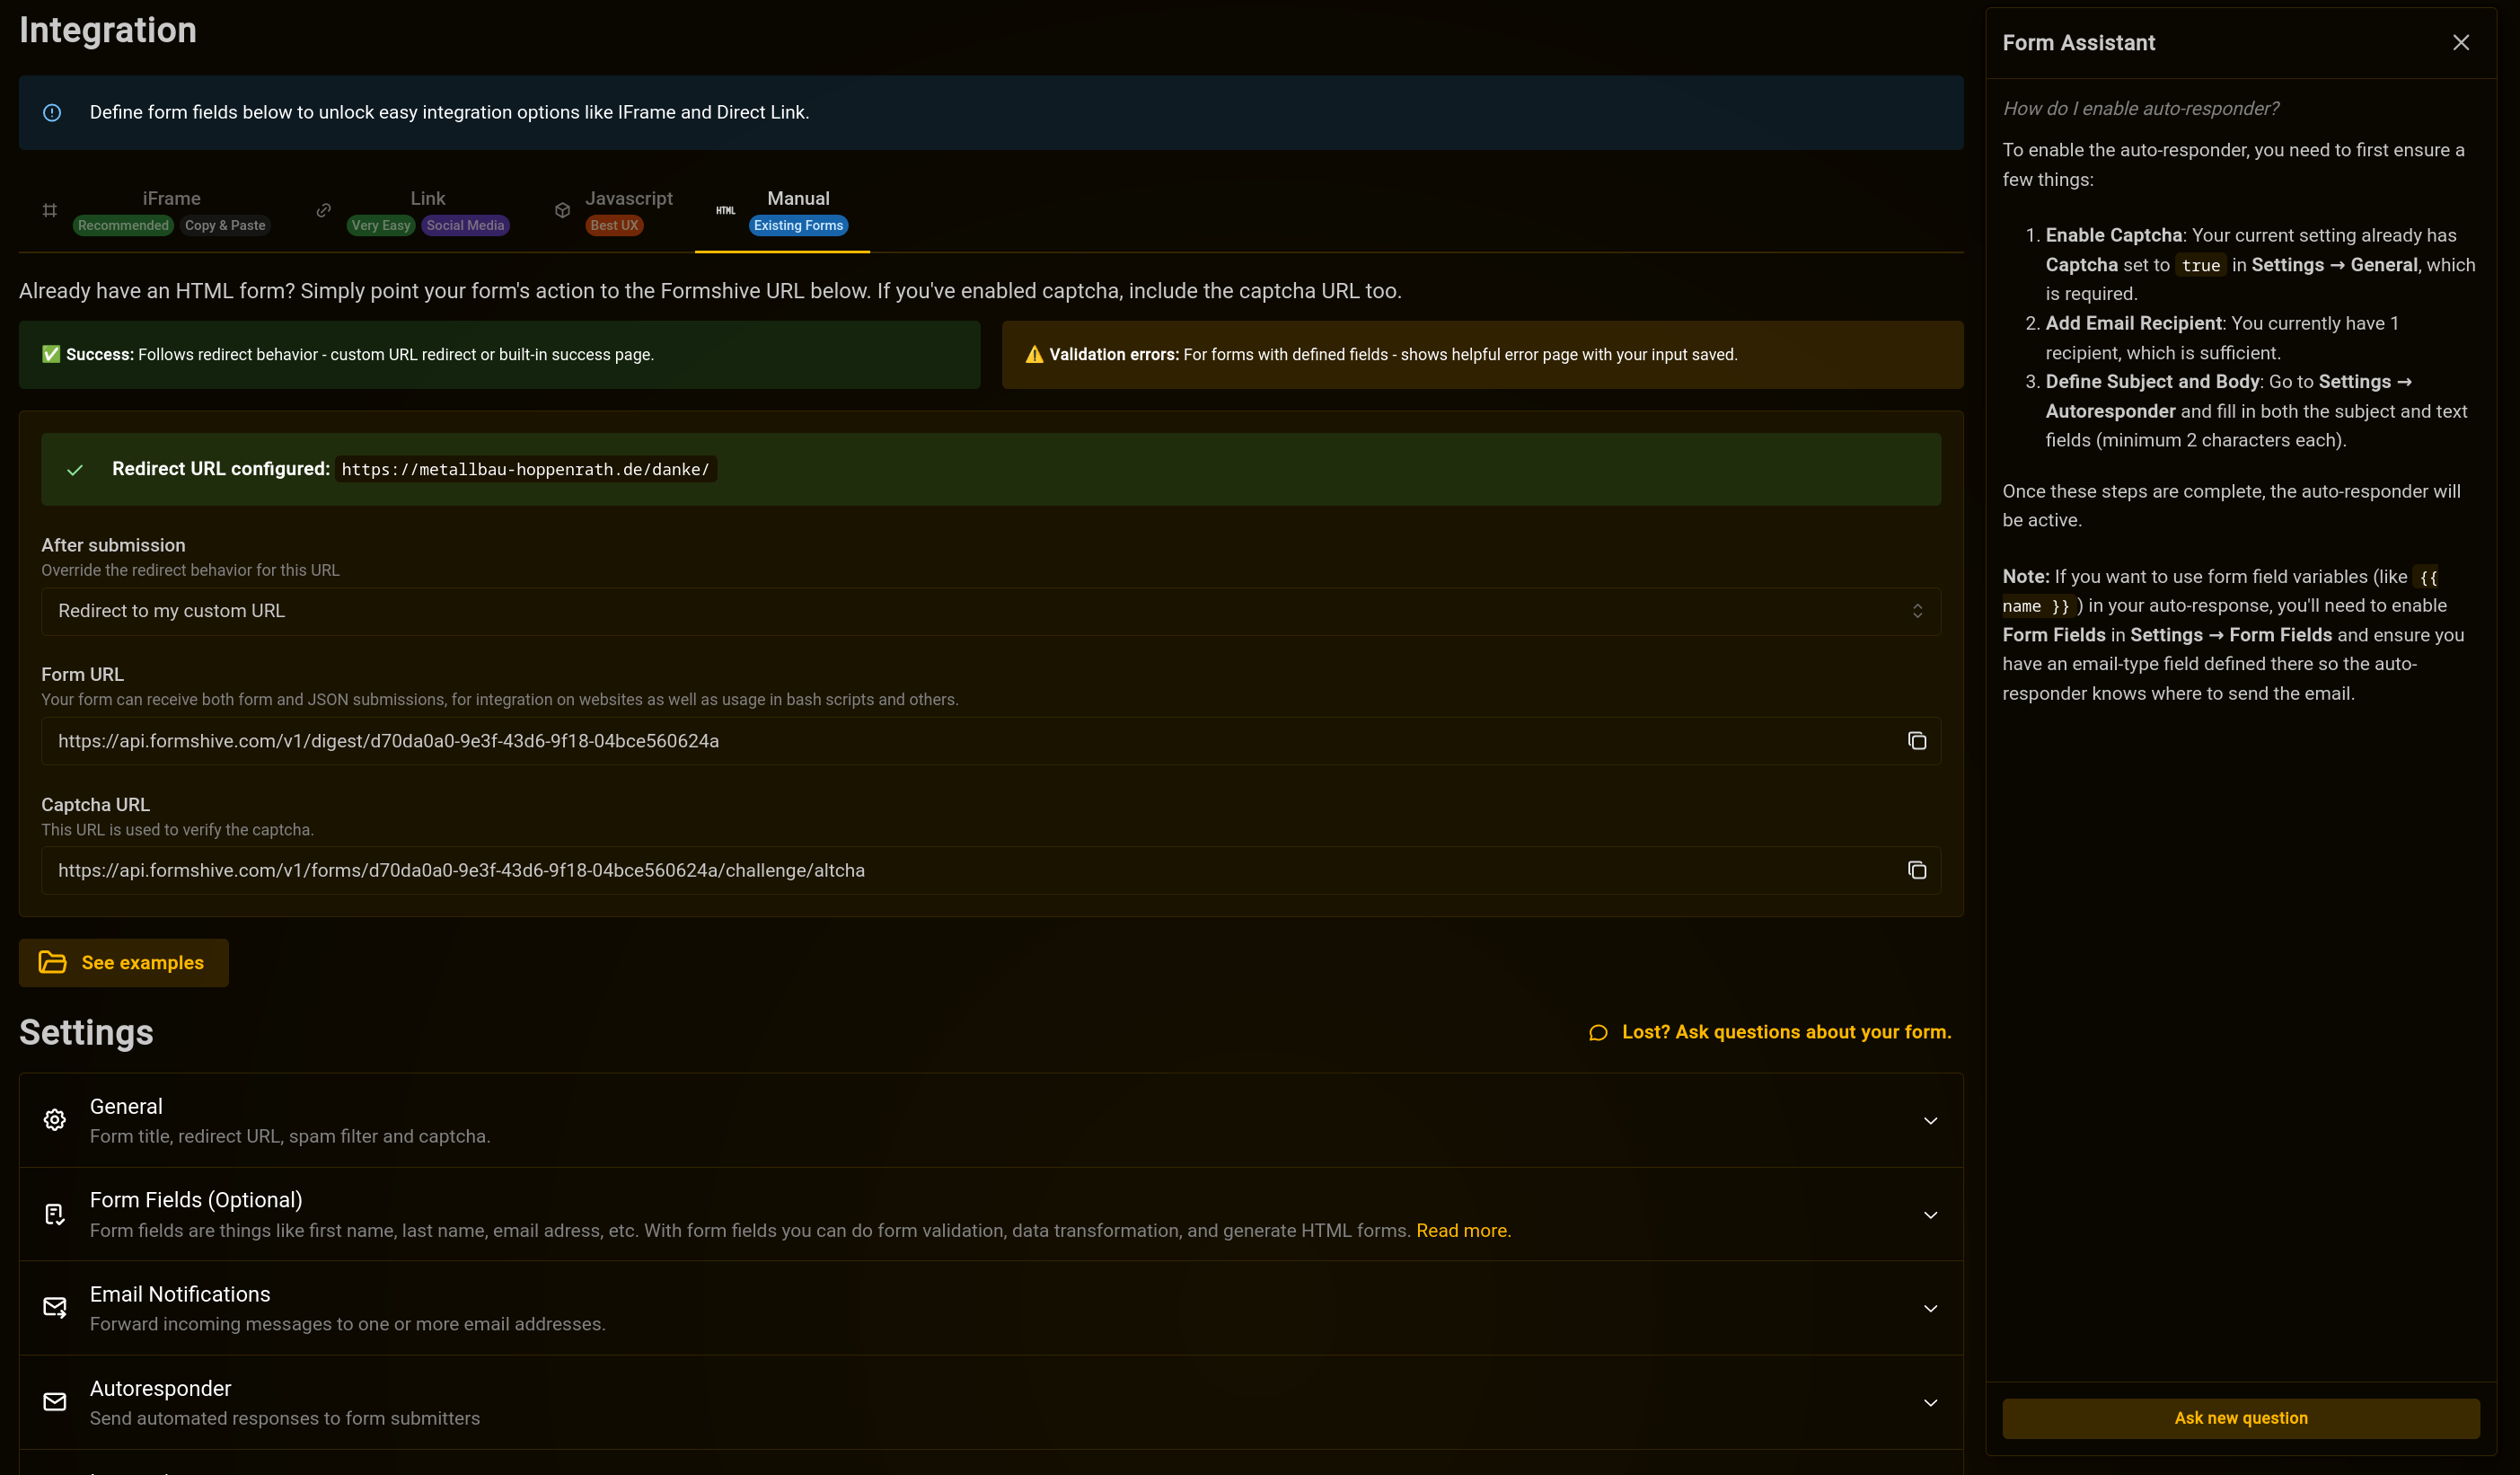
<p>Setting up forms can involve a lot of moving parts — recipients, auto-response emails, captcha, webhooks, field validation. Instead of digging through documentation, you can now just ask.</p>

<p><img src="/assets/images/2026-03-23-march-release-form-assistant.png" alt="Form Assistant in the editor" /></p>

<p>The Form Assistant is a chat panel built right into the form editor. Click the chat icon in the bottom-right corner, type your question, and get an answer that’s specific to your form. It knows your current settings, your fields, and your plan — so the advice is relevant, not generic.</p>

<p>A few things you can ask:</p>

<ul>
  <li>“How do I set up auto-response emails?”</li>
  <li>“Why isn’t my captcha working?”</li>
  <li>“What integration options do I have?”</li>
  <li>“How do I add file uploads to my form?”</li>
</ul>

<p>The assistant won’t change your form for you — it explains what to do and where to find the right settings. Think of it as having a knowledgeable guide available whenever you need one.</p>

<h2 id="two-factor-authentication">Two-Factor Authentication</h2>

<p>Your Formshive account can now be secured with two-factor authentication (2FA). This adds a second step to your login: after signing in as usual, you’ll be asked for a 6-digit code from an authenticator app on your phone.</p>

<h3 id="setting-it-up">Setting It Up</h3>

<ol>
  <li>Go to <strong>Settings → Security</strong></li>
  <li>Click <strong>Enable Two-Factor Authentication</strong></li>
  <li>Scan the QR code with your authenticator app (Google Authenticator, Authy, or any TOTP-compatible app)</li>
  <li>Enter the 6-digit code to verify</li>
  <li>Save your <strong>recovery codes</strong> somewhere safe — these are your backup if you lose access to your phone</li>
</ol>

<p>You’ll get 10 single-use recovery codes. Each one works once, and you can regenerate them at any time from the security settings (you’ll need a valid code to do so).</p>

<h3 id="how-login-changes">How Login Changes</h3>

<p>Once enabled, every login will prompt you for a code after your usual authentication step. You have 5 minutes to enter it. If you don’t have your authenticator handy, you can use one of your recovery codes instead.</p>

<h3 id="disabling-2fa">Disabling 2FA</h3>

<p>If you need to turn it off, go to Settings → Security, click the remove button on your authentication method, and confirm with a valid code. Straightforward.</p>

<h2 id="issue-tracking">Issue Tracking</h2>

<p>When something goes wrong with a form submission — a validation error, a failed webhook, a misconfigured auto-response — it used to just… disappear. You’d have to piece together what happened from email notifications or missing data.</p>

<p>The new <strong>Issues</strong> page changes that. Every problem that occurs during form processing is now logged and visible in one place.</p>

<h3 id="what-gets-tracked">What Gets Tracked</h3>

<ul>
  <li><strong>Validation</strong>: A submission was rejected by your field rules, or spam filtering couldn’t run</li>
  <li><strong>Auto-response</strong>: Skipped due to missing configuration, invalid email, or captcha not enabled</li>
  <li><strong>Notification</strong>: An email notification failed to deliver</li>
  <li><strong>Integration</strong>: Credentials rejected, timeout, network error, or misconfigured integration</li>
  <li><strong>Billing</strong>: Submission rejected due to insufficient balance or plan limit</li>
</ul>

<h3 id="what-you-see">What You See</h3>

<p>Each issue shows the date, the affected form, the error type and code, and a plain-language description of what went wrong. If the issue was triggered by a specific submission, there’s a direct link to view it.</p>

<p>You can filter between active and dismissed issues, and mark individual issues as resolved once you’ve addressed them.</p>

<h3 id="staying-on-top-of-things">Staying on Top of Things</h3>

<p>The Issues page is especially useful if you’re running multiple forms or integrations. Instead of guessing why submissions aren’t coming through or why auto-responses stopped working, you can check the Issues page and get a clear answer.</p>

<p>Issues from the same form with the same error are throttled — you won’t get flooded with duplicates. But every distinct problem is captured, so nothing slips through the cracks.</p>

<h2 id="available-now">Available Now</h2>

<p>All three features are live for all Formshive accounts. Head to your <a href="https://app.formshive.com">form editor</a> to try the AI assistant, enable 2FA in your <a href="https://app.formshive.com/#/account/settings">security settings</a>, or check your <a href="https://app.formshive.com/#/account/issues">Issues page</a> to see if anything needs attention.</p>]]></content><author><name>Franz Geffke</name></author><category term="Release" /><category term="features" /><category term="security" /><category term="release" /><summary type="html"><![CDATA[TL;DR: The form editor now has a built-in AI assistant that answers your questions in real time. You can protect your account with two-factor authentication. And a new Issues page shows you exactly what’s going wrong with your forms.]]></summary></entry><entry><title type="html">January Release: Encryption for Your Form Submissions</title><link href="https://blog.formshive.com/posts/january-release-encryption/" rel="alternate" type="text/html" title="January Release: Encryption for Your Form Submissions" /><published>2026-01-07T00:00:00+00:00</published><updated>2026-01-07T00:00:00+00:00</updated><id>https://blog.formshive.com/posts/january-release-encryption</id><content type="html" xml:base="https://blog.formshive.com/posts/january-release-encryption/"><![CDATA[<p>TL;DR: You can now encrypt form submissions. Choose between server-side encryption (we protect your data) or public-key encryption (only you can read it).</p>

<h2 id="why-encryption-matters">Why Encryption Matters</h2>

<p>If you collect sensitive information - client details, medical inquiries, legal requests, financial data - you want that data protected. Encryption ensures that even if someone gained unauthorized access to the database, they’d only see gibberish.</p>

<p>This is especially relevant for GDPR compliance, healthcare providers, legal professionals, and anyone handling confidential client communications.</p>

<h2 id="three-encryption-modes">Three Encryption Modes</h2>

<p>When you create a new form, you can now choose how submissions are protected:</p>

<h3 id="none-default">None (Default)</h3>

<p>This is how Formshive has always worked. Submissions are stored as-is. This is fine for non-sensitive data like newsletter signups or general inquiries.</p>

<h3 id="server-encryption">Server Encryption</h3>

<p>We encrypt your submissions before storing them. When you view them in the dashboard, we decrypt them for you automatically.</p>

<p>Think of it like a bank vault: your data is locked away securely, and we handle the keys. This protects against database breaches while keeping all features working normally.</p>

<h3 id="public-key-encryption-nostr">Public-Key Encryption (Nostr)</h3>

<p>This is the most private option. The server encrypts submissions with your public key, and only your private key can decrypt them.</p>

<p>This feature is powered by the Nostr standard, which means it works with Nostr browser extensions (like Alby or nos2x) that manage your keys automatically. You don’t have to handle encryption keys manually - your browser extension takes care of it.</p>

<p>The data is briefly visible to the server during processing (for validation, etc.). Once stored, even we can’t read your submissions - only you can unlock them.</p>

<ol>
  <li>Form submission to server (TLS encrypted)</li>
  <li>Server encrypts submission with your public key</li>
  <li>Encrypted submission stored in database</li>
  <li>You view submission in dashboard and decrypt it with your private key (via browser extension)</li>
</ol>

<p><strong>Requirements:</strong></p>
<ul>
  <li>You must be logged in with Nostr (not email)</li>
  <li>You need a Nostr browser extension like Alby or nos2x</li>
</ul>

<h2 id="what-works-with-each-mode">What Works With Each Mode</h2>

<p>Not all features work with every encryption mode. Here’s what to expect:</p>

<table>
  <thead>
    <tr>
      <th>Feature</th>
      <th>None</th>
      <th>Server</th>
      <th>Public-Key</th>
    </tr>
  </thead>
  <tbody>
    <tr>
      <td>Email notifications with content</td>
      <td>Yes</td>
      <td>Yes</td>
      <td>No*</td>
    </tr>
    <tr>
      <td>Auto-response emails</td>
      <td>Yes</td>
      <td>Yes</td>
      <td>No</td>
    </tr>
    <tr>
      <td>Webhooks with submission data</td>
      <td>Yes</td>
      <td>Yes</td>
      <td>No*</td>
    </tr>
    <tr>
      <td>Integrations (Pipedream, etc.)</td>
      <td>Yes</td>
      <td>Yes</td>
      <td>No*</td>
    </tr>
  </tbody>
</table>

<p>*With public-key encryption, you can still receive notifications and webhook calls, but they won’t include the submission content (since we can’t read it). You’ll get a link to view and decrypt the submission in your dashboard.</p>

<h2 id="important-notes">Important Notes</h2>

<ul>
  <li><strong>Choose wisely</strong>: The encryption mode is set when you create the form and cannot be changed later</li>
  <li><strong>File uploads</strong>: Attached files are stored separately and are not encrypted, regardless of which mode you choose</li>
  <li><strong>Lost keys</strong>: With public-key encryption, if you lose access to your private key, your submissions are gone forever - we cannot recover them</li>
</ul>

<h2 id="how-to-use-encryption">How to Use Encryption</h2>

<ol>
  <li>Go to your dashboard and click <strong>New Form</strong></li>
  <li>In the form settings, look for <strong>Encryption Mode</strong></li>
  <li>Select your preferred option:
    <ul>
      <li><strong>None</strong> for standard forms</li>
      <li><strong>Server</strong> for encrypted storage with full features</li>
      <li><strong>Public-Key</strong> for maximum privacy (requires Nostr login)</li>
    </ul>
  </li>
  <li>Save your form and start collecting submissions</li>
</ol>

<p>For public-key encrypted forms, you’ll see a <strong>Decrypt</strong> button when viewing submissions. Click it, and your browser extension will unlock the content.</p>

<h2 id="which-mode-should-you-choose">Which Mode Should You Choose?</h2>

<ul>
  <li><strong>Newsletter signups, feedback forms</strong>: None is fine</li>
  <li><strong>Contact forms, business inquiries</strong>: Server encryption adds peace of mind</li>
  <li><strong>Sensitive data, privacy-critical applications</strong>: Public-key encryption if you need maximum security and can accept the trade-offs</li>
</ul>

<p>Encryption is available now for all Formshive accounts. Create a new form to try it out.</p>]]></content><author><name>Franz Geffke</name></author><category term="Release" /><category term="features" /><category term="security" /><category term="release" /><category term="privacy" /><summary type="html"><![CDATA[TL;DR: You can now encrypt form submissions. Choose between server-side encryption (we protect your data) or public-key encryption (only you can read it).]]></summary></entry><entry><title type="html">September Release: Scoped API Keys, Enhanced UI, and Better Table Control</title><link href="https://blog.formshive.com/posts/september-release/" rel="alternate" type="text/html" title="September Release: Scoped API Keys, Enhanced UI, and Better Table Control" /><published>2025-09-30T00:00:00+00:00</published><updated>2025-09-30T00:00:00+00:00</updated><id>https://blog.formshive.com/posts/september-release</id><content type="html" xml:base="https://blog.formshive.com/posts/september-release/"><![CDATA[<p>TL;DR: Added scoped API keys with budget limits and expiration, improved dark mode with warm color tones, and added per-page table item configuration.</p>

<h2 id="scoped-api-keys">Scoped API Keys</h2>

<p>API keys now support granular permission scopes, budget limits, and automatic expiration - giving you fine-grained control over programmatic access to your forms.</p>

<h3 id="permission-scopes">Permission Scopes</h3>

<p>Create API keys with specific permissions for different resources:</p>

<ul>
  <li><strong>Forms</strong>: <code>forms:read</code>, <code>forms:write</code>, <code>forms:delete</code>, or <code>forms:*</code> (all)</li>
  <li><strong>Messages</strong>: <code>messages:read</code>, <code>messages:write</code>, <code>messages:delete</code>, or <code>messages:*</code> (all)</li>
  <li><strong>Integrations</strong>: <code>integrations:read</code>, <code>integrations:write</code>, <code>integrations:delete</code>, or <code>integrations:*</code> (all)</li>
</ul>

<p>This lets you create specialized API keys for different use cases:</p>
<ul>
  <li>Read-only keys for monitoring and analytics</li>
  <li>Write-only keys for form submissions via API</li>
  <li>Full-access keys for administrative tasks</li>
</ul>

<h3 id="budget-limits">Budget Limits</h3>

<p>Set spending limits on API keys to prevent unexpected costs. Budget limits are specified in cents (e.g., <code>allowance:50000</code> for a 500 EUR limit). When a key exceeds its budget, requests are automatically rejected with a clear error message.</p>

<h3 id="expiration-dates">Expiration Dates</h3>

<p>API keys can expire automatically after 1-365 days. This is particularly useful for:</p>
<ul>
  <li>Temporary access grants</li>
  <li>Time-limited integrations</li>
  <li>Security compliance requirements</li>
</ul>

<h3 id="security-features">Security Features</h3>

<p>The implementation includes comprehensive validation and error handling:</p>
<ul>
  <li>Keys can be activated/deactivated</li>
  <li>Detailed error messages for unauthorized access</li>
  <li>Budget exceeded notifications</li>
</ul>

<h3 id="testing-your-api-keys">Testing Your API Keys</h3>

<p>Test your API keys easily using the Swagger UI at <a href="https://api.formshive.com/swagger-ui/">api.formshive.com/swagger-ui/</a>. The interactive documentation lets you try endpoints, see response formats, and verify your key permissions.</p>

<h2 id="improved-layout-and-color-scheme">Improved Layout and Color Scheme</h2>

<p>The interface now features a refined color palette with better visual consistency.</p>

<h2 id="table-configuration">Table Configuration</h2>

<p>You can now control how many items appear in your tables. Select from multiple options (10, 25, 50, or more) directly from the table view.</p>

<p>This setting applies to:</p>
<ul>
  <li>Forms list</li>
  <li>Messages/submissions</li>
  <li>Integrations overview</li>
</ul>

<p>Your preference is saved automatically and persists across sessions.</p>

<h2 id="getting-started">Getting Started</h2>

<p>These features are available now for all Formshive accounts. Visit your <a href="https://app.formshive.com/#/account/api-keys">API Keys page</a> to create your first scoped API key, or explore the new interface improvements throughout the application.</p>]]></content><author><name>Franz Geffke</name></author><category term="Release" /><category term="features" /><category term="api" /><category term="release" /><summary type="html"><![CDATA[TL;DR: Added scoped API keys with budget limits and expiration, improved dark mode with warm color tones, and added per-page table item configuration.]]></summary></entry><entry><title type="html">API Documentation Now Available: Complete Swagger UI and OpenAPI Specs</title><link href="https://blog.formshive.com/posts/api-documentation-available/" rel="alternate" type="text/html" title="API Documentation Now Available: Complete Swagger UI and OpenAPI Specs" /><published>2025-08-31T00:00:00+00:00</published><updated>2025-08-31T00:00:00+00:00</updated><id>https://blog.formshive.com/posts/api-documentation-available</id><content type="html" xml:base="https://blog.formshive.com/posts/api-documentation-available/"><![CDATA[<p>TL;DR: Formshive API documentation is now available through interactive Swagger UI and downloadable OpenAPI specification for easier integration and development.</p>

<h2 id="complete-api-documentation">Complete API Documentation</h2>

<p>We’ve published comprehensive API documentation to make integrating with Formshive even easier. The documentation is available in two formats:</p>

<ul>
  <li><strong>Interactive Swagger UI</strong>: <a href="https://api.formshive.com/swagger-ui/">api.formshive.com/swagger-ui/</a></li>
  <li><strong>OpenAPI JSON specification</strong>: <a href="https://api.formshive.com/api-docs/openapi.json">api.formshive.com/api-docs/openapi.json</a></li>
</ul>

<h2 id="whats-included">What’s Included</h2>

<p>The documentation covers all available API endpoints with detailed information:</p>

<ul>
  <li><strong>Request/response schemas</strong>: Complete field descriptions and data types</li>
  <li><strong>Authentication methods</strong>: How to authenticate your API calls</li>
  <li><strong>Code examples</strong>: Sample requests in multiple programming languages</li>
  <li><strong>Error handling</strong>: Common error codes and troubleshooting</li>
  <li><strong>Interactive testing</strong>: Try API calls directly from the documentation</li>
</ul>

<h2 id="benefits-for-developers">Benefits for Developers</h2>

<h3 id="interactive-testing">Interactive Testing</h3>
<p>Use the Swagger UI to test API endpoints directly in your browser. No need to set up API clients or write test code - just fill in the parameters and execute requests.</p>

<h3 id="code-generation">Code Generation</h3>
<p>The OpenAPI specification can be used with code generation tools to automatically create client libraries in your preferred programming language.</p>

<h3 id="integration-planning">Integration Planning</h3>
<p>Review all available endpoints and data structures before starting your integration to plan the most efficient implementation.</p>

<h2 id="getting-started">Getting Started</h2>

<ol>
  <li>Visit the <a href="https://api.formshive.com/swagger-ui/">Swagger UI</a> to explore available endpoints</li>
  <li>Use the “Try it out” feature to test API calls with your authentication credentials</li>
  <li>Download the <a href="https://api.formshive.com/api-docs/openapi.json">OpenAPI specification</a> for code generation tools</li>
  <li>Reference the documentation while building your integration</li>
</ol>

<h2 id="security-and-authentication">Security and Authentication</h2>

<p>All API endpoints require proper authentication. The documentation includes detailed information about:</p>

<ul>
  <li>API key authentication methods</li>
  <li>Required headers and parameters</li>
  <li>Rate limiting and best practices</li>
  <li>Security considerations for production use</li>
</ul>

<p>Having complete API documentation makes it easier to build reliable integrations and take full advantage of Formshive’s features programmatically.</p>]]></content><author><name>Formshive Team</name><email>hello@formshive.com</email></author><category term="Release" /><category term="api" /><category term="documentation" /><category term="integration" /><summary type="html"><![CDATA[TL;DR: Formshive API documentation is now available through interactive Swagger UI and downloadable OpenAPI specification for easier integration and development.]]></summary></entry><entry><title type="html">Cryptocurrency Deposits via Coinbase Now Available</title><link href="https://blog.formshive.com/posts/cryptocurrency-deposits-coinbase/" rel="alternate" type="text/html" title="Cryptocurrency Deposits via Coinbase Now Available" /><published>2025-08-31T00:00:00+00:00</published><updated>2025-08-31T00:00:00+00:00</updated><id>https://blog.formshive.com/posts/cryptocurrency-deposits-coinbase</id><content type="html" xml:base="https://blog.formshive.com/posts/cryptocurrency-deposits-coinbase/"><![CDATA[<p>TL;DR: You can now fund your Formshive account using cryptocurrency through Coinbase, supporting Bitcoin, Ethereum, USDT, and other major digital currencies.</p>

<h2 id="cryptocurrency-payment-support">Cryptocurrency Payment Support</h2>

<p>Formshive now accepts cryptocurrency deposits through Coinbase Commerce, making it easier to fund your account with digital assets:</p>

<ul>
  <li><strong>Bitcoin (BTC)</strong>: The original cryptocurrency</li>
  <li><strong>Ethereum (ETH)</strong>: Popular smart contract platform</li>
  <li><strong>USDT</strong>: Stable coin pegged to the US dollar</li>
  <li><strong>Additional currencies</strong>: Support for other major cryptocurrencies available on Coinbase</li>
</ul>

<h2 id="how-it-works">How It Works</h2>

<p>The deposit process is straightforward:</p>

<ol>
  <li>Go to your account balance page</li>
  <li>Select “Add Funds” and choose “Cryptocurrency”</li>
  <li>Choose your preferred currency and deposit amount</li>
  <li>Complete the payment through Coinbase Commerce</li>
  <li>Funds appear in your account after blockchain confirmation</li>
</ol>

<h2 id="benefits">Benefits</h2>

<ul>
  <li><strong>Global accessibility</strong>: Pay from anywhere without traditional banking</li>
  <li><strong>Privacy</strong>: No need to share credit card details</li>
  <li><strong>Lower fees</strong>: Often reduced transaction costs compared to traditional payments</li>
  <li><strong>Fast processing</strong>: Most deposits confirm within minutes to hours</li>
</ul>

<h2 id="security">Security</h2>

<p>All cryptocurrency transactions are processed securely through Coinbase Commerce:</p>

<ul>
  <li>Industry-standard security protocols</li>
  <li>Transparent blockchain verification</li>
  <li>No cryptocurrency stored on our servers</li>
</ul>

<h2 id="getting-started">Getting Started</h2>

<p>Visit your account dashboard and look for the new cryptocurrency payment option.</p>

<p>Perfect for users who prefer digital currency transactions or need an alternative to traditional payment methods.</p>]]></content><author><name>Franz Geffke</name></author><category term="Release" /><category term="features" /><category term="payments" /><summary type="html"><![CDATA[TL;DR: You can now fund your Formshive account using cryptocurrency through Coinbase, supporting Bitcoin, Ethereum, USDT, and other major digital currencies.]]></summary></entry><entry><title type="html">Form Analytics: Track Views, Conversions, and Performance</title><link href="https://blog.formshive.com/posts/form-analytics-and-conversion-tracking/" rel="alternate" type="text/html" title="Form Analytics: Track Views, Conversions, and Performance" /><published>2025-07-23T00:00:00+00:00</published><updated>2025-07-23T00:00:00+00:00</updated><id>https://blog.formshive.com/posts/form-analytics-and-conversion-tracking</id><content type="html" xml:base="https://blog.formshive.com/posts/form-analytics-and-conversion-tracking/"><![CDATA[<p>TL;DR: New analytics dashboard shows form views, submissions, conversion rates, and performance insights to help optimize your forms.</p>

<h2 id="form-analytics">Form Analytics</h2>

<p>Understanding how your forms perform is crucial for optimization. Formshive now provides comprehensive analytics to track:</p>

<ul>
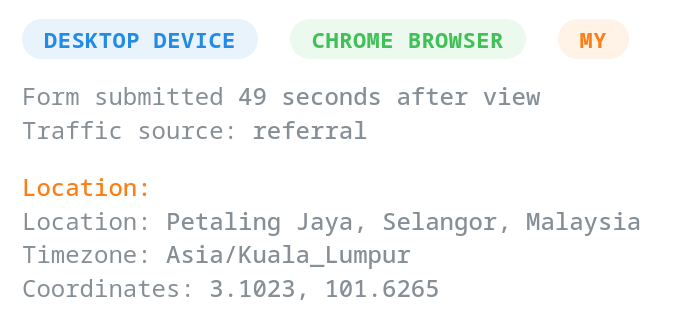
  <li><strong>Form views</strong>: Who’s seeing your forms and from where</li>
  <li><strong>Conversion rates</strong>: How many viewers actually submit</li>
  <li><strong>Traffic sources</strong>: Which channels drive the most submissions</li>
  <li><strong>Geographic insights</strong>: Where your audience is located</li>
  <li><strong>Device breakdown</strong>: Mobile, tablet, and desktop usage</li>
</ul>

<p><img src="/assets/images/2025-07-23-form-analytics-and-conversion-tracking.png" alt="Formshive - Conversion Tracking" /></p>

<h2 id="key-metrics">Key Metrics</h2>

<h3 id="conversion-tracking">Conversion Tracking</h3>
<p>See your form’s conversion rate over time with daily breakdowns. Track how changes to your form affect submission rates and identify high-performing periods.</p>

<h3 id="traffic-analysis">Traffic Analysis</h3>
<p>Understand where your form traffic comes from:</p>
<ul>
  <li>Direct visits</li>
  <li>Google search results</li>
  <li>Social media referrals</li>
  <li>Email campaigns</li>
</ul>

<h3 id="device-insights">Device Insights</h3>
<p>Monitor how users interact with your forms across devices. Optimize for mobile if that’s where most conversions happen, or improve desktop experience based on your data.</p>

<h2 id="privacy-first-analytics">Privacy-First Analytics</h2>

<p>All analytics respect user privacy:</p>
<ul>
  <li><strong>No cookies required</strong>: Works without tracking cookies</li>
  <li><strong>IP hashing</strong>: IP addresses are immediately hashed, never stored raw</li>
  <li><strong>GDPR compliant</strong>: Designed for European privacy standards</li>
</ul>

<h2 id="getting-started">Getting Started</h2>

<p>Analytics are automatically enabled for all forms. View your stats by:</p>

<ol>
  <li>Going to your form dashboard</li>
  <li>Selecting a form</li>
</ol>

<h2 id="use-cases">Use Cases</h2>

<p><strong>Lead Generation</strong>: Monitor which traffic sources convert best and focus your marketing efforts accordingly.</p>

<p><strong>Form Optimization</strong>: A/B test form changes and measure their impact on conversion rates.</p>

<p><strong>Audience Insights</strong>: Understand your global reach and optimize for your primary geographic markets.</p>

<p><strong>Performance Monitoring</strong>: Identify trends and seasonal patterns in form usage.</p>

<p>The analytics feature helps you make data-driven decisions about your forms while maintaining strong privacy protections for your users.</p>]]></content><author><name>Franz Geffke</name></author><category term="Release" /><category term="features" /><category term="analytics" /><summary type="html"><![CDATA[TL;DR: New analytics dashboard shows form views, submissions, conversion rates, and performance insights to help optimize your forms.]]></summary></entry><entry><title type="html">Formshive: Europäische SaaS für globalen Datenschutz</title><link href="https://blog.formshive.com/posts/formshive-europaeische-saas-datenschutz-compliance/" rel="alternate" type="text/html" title="Formshive: Europäische SaaS für globalen Datenschutz" /><published>2025-07-17T00:00:00+00:00</published><updated>2025-07-17T00:00:00+00:00</updated><id>https://blog.formshive.com/posts/formshive-europaeische-saas-datenschutz-compliance</id><content type="html" xml:base="https://blog.formshive.com/posts/formshive-europaeische-saas-datenschutz-compliance/"><![CDATA[<p>TL;DR: Formshive wird in Europa entwickelt und betrieben, wodurch DSGVO-Konformität, starker Datenschutz und Sicherheit für Unternehmen weltweit gewährleistet wird.</p>

<h2 id="warum-europäische-saas-wichtig-ist">Warum europäische SaaS wichtig ist</h2>

<p>Immer mehr Unternehmen entscheiden sich für EU-basierte SaaS-Anbieter - aus gutem Grund. Wenn Sie Formshive nutzen, bleiben Ihre Daten innerhalb europäischer Grenzen, geschützt durch einige der strengsten Datenschutzgesetze der Welt.</p>

<h2 id="datenschutz-dem-sie-vertrauen-können">Datenschutz, dem Sie vertrauen können</h2>

<p>Europäischer Datenschutz ist nicht nur Compliance - es geht um Vertrauen:</p>

<ul>
  <li><strong>DSGVO by Design</strong>: Ihre Formulardaten werden mit hohen Standards für Transparenz und Sicherheit behandelt</li>
  <li><strong>Keine Drittlandübertragungen</strong>: Daten bleiben innerhalb des EU-Rechtsrahmens</li>
  <li><strong>Klare Rechte</strong>: Sie wissen genau, was mit Ihren Daten passiert und können sie kontrollieren</li>
</ul>

<h2 id="über-compliance-hinaus">Über Compliance hinaus</h2>

<p>Die Vorteile gehen tiefer als nur rechtliche Anforderungen:</p>

<ul>
  <li><strong>Internationaler Support</strong>: Primärer Support auf Deutsch und Englisch, mit Übersetzung für globale Kunden</li>
  <li><strong>Rechtssicherheit</strong>: Vermeiden Sie rechtliche Grauzonen bei internationalen Datenübertragungen</li>
  <li><strong>Steuervorteile</strong>: EU-Unternehmen können Mehrwertsteuerrückerstattungen für europäische Services beanspruchen</li>
</ul>

<h2 id="globale-reichweite">Globale Reichweite</h2>

<p>Obwohl wir europäisch sind, bedient Formshive Unternehmen weltweit. Unsere Website ist in 7+ Sprachen verfügbar. Ob Sie in São Paulo, San Francisco, Madrid, Singapur oder Sydney sind - Formshive ist ein zuverlässiger Partner.</p>

<h2 id="erste-schritte">Erste Schritte</h2>

<p>Ihre Formulare, Ihre Sprache, Ihr Datenschutz. Wechseln Sie zu Formshive unter <a href="https://formshive.com">formshive.com</a> und erleben Sie europäische Datenschutzstandards mit globaler Reichweite.</p>

<hr />

<p><em>Fragen zu unseren Datenschutzpraktiken? Kontaktieren Sie uns unter hello@formshive.com</em></p>]]></content><author><name>Franz Geffke</name></author><category term="Release" /><category term="privacy" /><category term="security" /><category term="compliance" /><category term="features" /><summary type="html"><![CDATA[TL;DR: Formshive wird in Europa entwickelt und betrieben, wodurch DSGVO-Konformität, starker Datenschutz und Sicherheit für Unternehmen weltweit gewährleistet wird.]]></summary></entry><entry><title type="html">Formshive: European SaaS Built for Global Privacy</title><link href="https://blog.formshive.com/posts/formshive-european-saas-privacy-compliance/" rel="alternate" type="text/html" title="Formshive: European SaaS Built for Global Privacy" /><published>2025-07-17T00:00:00+00:00</published><updated>2025-07-17T00:00:00+00:00</updated><id>https://blog.formshive.com/posts/formshive-european-saas-privacy-compliance</id><content type="html" xml:base="https://blog.formshive.com/posts/formshive-european-saas-privacy-compliance/"><![CDATA[<p>TL;DR: Formshive is built and operated in Europe, ensuring GDPR compliance, stronger data protection, and peace of mind for businesses worldwide.</p>

<h2 id="why-european-saas-matters">Why European SaaS Matters</h2>

<p>More businesses are choosing EU-based SaaS providers for good reasons. When you use Formshive, your data stays within European borders, protected by some of the world’s strictest privacy laws.</p>

<h2 id="data-protection-you-can-trust">Data Protection You Can Trust</h2>

<p>European data protection isn’t just about compliance - it’s about building trust:</p>

<ul>
  <li><strong>GDPR by design</strong>: Your form data is handled with high standards of transparency and security</li>
  <li><strong>No third-country transfers</strong>: Data stays within the EU legal framework</li>
  <li><strong>Clear rights</strong>: You know exactly what happens to your data and can control it</li>
</ul>

<h2 id="beyond-compliance">Beyond Compliance</h2>

<p>The benefits go deeper than legal checkboxes:</p>

<ul>
  <li><strong>International support</strong>: Primary support in English and German, with translation for global customers</li>
  <li><strong>Regulatory certainty</strong>: Avoid legal grey areas of international data transfers</li>
  <li><strong>Tax advantages</strong>: EU businesses can claim VAT refunds on European services</li>
</ul>

<h2 id="global-impact">Global Impact</h2>

<p>While we’re European, Formshive serves businesses worldwide. Our website is available in 7+ languages. Whether you’re in São Paulo, San Francisco, Madrid, Singapore, or Sydney - Formshive is a reliable partner.</p>

<h2 id="getting-started">Getting Started</h2>

<p>Your forms, your language, your data protection. Switch to Formshive at <a href="https://formshive.com">formshive.com</a> and experience European privacy standards with global reach.</p>

<hr />

<p><em>Questions about our privacy practices? Contact us at hello@formshive.com</em></p>]]></content><author><name>Franz Geffke</name></author><category term="Release" /><category term="privacy" /><category term="security" /><category term="compliance" /><category term="features" /><summary type="html"><![CDATA[TL;DR: Formshive is built and operated in Europe, ensuring GDPR compliance, stronger data protection, and peace of mind for businesses worldwide.]]></summary></entry><entry><title type="html">Powerful Integrations: Pipedrive CRM, Mailchimp, and Kit Email Marketing</title><link href="https://blog.formshive.com/posts/powerful-integrations-pipedrive-mailchimp-kit/" rel="alternate" type="text/html" title="Powerful Integrations: Pipedrive CRM, Mailchimp, and Kit Email Marketing" /><published>2025-06-29T00:00:00+00:00</published><updated>2025-06-29T00:00:00+00:00</updated><id>https://blog.formshive.com/posts/powerful-integrations-pipedrive-mailchimp-kit</id><content type="html" xml:base="https://blog.formshive.com/posts/powerful-integrations-pipedrive-mailchimp-kit/"><![CDATA[<p>TL;DR: Formshive now connects directly to Pipedrive CRM, Mailchimp, and Kit email marketing platforms, plus enhanced webhook integrations for Zapier, Slack, and Google Sheets.</p>

<h2 id="direct-api-integrations">Direct API Integrations</h2>

<p>We’ve moved beyond simple webhooks to native API integrations with popular business tools. Your form submissions now automatically create contacts, leads, and subscribers without any third-party services.</p>

<h3 id="pipedrive-crm-integration">Pipedrive CRM Integration</h3>

<p>Transform form submissions into CRM contacts and sales leads automatically.</p>

<p><strong>Key Features:</strong></p>
<ul>
  <li><strong>Person Creation</strong>: Every submission creates a contact with email, phone, and custom fields</li>
  <li><strong>Lead Generation</strong>: Optionally create sales leads for your team to follow up</li>
  <li><strong>Custom Field Mapping</strong>: Map form fields to your Pipedrive custom fields</li>
  <li><strong>Owner Assignment</strong>: Assign leads to specific team members automatically</li>
  <li><strong>Organization Linking</strong>: Connect contacts to existing organizations</li>
</ul>

<p><strong>Setup Requirements:</strong></p>
<ul>
  <li>Pipedrive API token from Settings → Personal Preferences → API</li>
  <li>Company domain (e.g., yourcompany.pipedrive.com)</li>
  <li>Form must include <code>name</code> field or <code>first_name</code> + <code>last_name</code></li>
</ul>

<h3 id="mailchimp-email-marketing">Mailchimp Email Marketing</h3>

<p>Add form submitters directly to your email marketing audiences.</p>

<p><strong>Key Features:</strong></p>
<ul>
  <li><strong>Audience Addition</strong>: Automatically subscribe users to specified lists</li>
  <li><strong>Merge Field Mapping</strong>: Map form fields to Mailchimp merge fields (FNAME, LNAME, PHONE)</li>
  <li><strong>Tag Management</strong>: Apply tags automatically for segmentation</li>
  <li><strong>Double Opt-in Support</strong>: GDPR-compliant email confirmation process</li>
  <li><strong>Status Control</strong>: Set subscribers as “subscribed” or “pending”</li>
</ul>

<p><strong>Setup Requirements:</strong></p>
<ul>
  <li>Mailchimp API key from Account → Extras → API Keys</li>
  <li>Audience List ID from your target audience settings</li>
  <li>Form must include <code>email</code> field</li>
</ul>

<h3 id="kit-convertkit-integration">Kit (ConvertKit) Integration</h3>

<p>Connect forms to your Kit email marketing workflows.</p>

<p><strong>Key Features:</strong></p>
<ul>
  <li><strong>Subscriber Creation</strong>: Add contacts with custom fields and tags</li>
  <li><strong>Form Integration</strong>: Associate subscribers with specific Kit forms</li>
  <li><strong>Field Mapping</strong>: Map to first_name, last_name, company, and custom fields</li>
  <li><strong>Tag Application</strong>: Automatic tagging for segmentation and automation</li>
  <li><strong>Two-Step Process</strong>: Creates subscriber then adds to form for trigger automation</li>
</ul>

<p><strong>Setup Requirements:</strong></p>
<ul>
  <li>Kit API key from Account Settings → API Keys</li>
  <li>Form ID from your Kit form URL</li>
  <li>Form must include <code>email</code> field</li>
</ul>

<h2 id="enhanced-webhook-integrations">Enhanced Webhook Integrations</h2>

<p><strong>Zapier Workflows</strong>: Connect to 8,000+ apps with zero-code automation workflows.</p>

<p><strong>Slack Notifications</strong>: Get instant team alerts with formatted messages in your channels.</p>

<p><strong>Google Sheets</strong>: Automatically append form data to spreadsheets with our provided Apps Script template.</p>

<p><strong>Custom Webhooks</strong>: Send data to any HTTP endpoint with complete form payloads.</p>

<h2 id="security-and-reliability">Security and Reliability</h2>

<p><strong>Enterprise-Grade Security:</strong></p>
<ul>
  <li>All API keys encrypted with AES-256-GCM encryption</li>
  <li>Keys stored securely and never logged</li>
  <li>Secure credential management throughout the system</li>
</ul>

<p><strong>Reliable Processing:</strong></p>
<ul>
  <li>Form submissions succeed even if integrations fail</li>
  <li>Integration failures logged for debugging</li>
  <li>No impact on form functionality during service outages</li>
</ul>

<h2 id="field-mapping-and-data-handling">Field Mapping and Data Handling</h2>

<p><strong>Smart Field Recognition:</strong></p>
<ul>
  <li>Name fields automatically combined (<code>first_name</code> + <code>last_name</code> → <code>name</code>)</li>
  <li>Email and phone fields mapped to appropriate service fields</li>
  <li>Custom field mapping for advanced use cases</li>
</ul>

<p><strong>Data Transformation:</strong></p>
<ul>
  <li>JSON form data converted to service-specific formats</li>
  <li>Template variables supported (e.g., lead titles)</li>
  <li>Flexible field mapping for complex requirements</li>
</ul>

<h2 id="getting-started">Getting Started</h2>

<p><strong>Create Integration</strong>: Visit your account dashboard and choose “Integrations” to set up new connections.</p>

<p><strong>Configure Fields</strong>: Map your form fields to service-specific fields using our visual interface.</p>

<p><strong>Connect to Forms</strong>: Associate integrations with specific forms for targeted data flow.</p>

<p><strong>Test Integration</strong>: Submit a test form to verify the connection works correctly.</p>

<p>All integrations include comprehensive setup guides with step-by-step instructions and code examples. API credentials are encrypted and stored securely, ensuring your data remains protected while enabling powerful automation workflows.</p>]]></content><author><name>Formshive Team</name><email>hello@formshive.com</email></author><category term="Release" /><category term="features" /><category term="integrations" /><category term="pipedrive" /><category term="mailchimp" /><category term="kit" /><summary type="html"><![CDATA[TL;DR: Formshive now connects directly to Pipedrive CRM, Mailchimp, and Kit email marketing platforms, plus enhanced webhook integrations for Zapier, Slack, and Google Sheets.]]></summary></entry><entry><title type="html">Monthly Subscriptions and Referrals: Flexible Pricing with Mutual Rewards</title><link href="https://blog.formshive.com/posts/monthly-subscriptions-and-referrals/" rel="alternate" type="text/html" title="Monthly Subscriptions and Referrals: Flexible Pricing with Mutual Rewards" /><published>2025-06-28T00:00:00+00:00</published><updated>2025-06-28T00:00:00+00:00</updated><id>https://blog.formshive.com/posts/monthly-subscriptions-and-referrals</id><content type="html" xml:base="https://blog.formshive.com/posts/monthly-subscriptions-and-referrals/"><![CDATA[<p>TL;DR: Formshive now offers monthly subscription plans with generous allowances and a 10% referral program where both you and your referred friends earn rewards.</p>

<h2 id="monthly-subscription-plans">Monthly Subscription Plans</h2>

<p>We’ve introduced four subscription tiers designed to grow with your needs:</p>

<h3 id="free-plan---0month">Free Plan - €0/month</h3>
<ul>
  <li>10 form submissions</li>
  <li>10 spam filters</li>
  <li>10 email notifications</li>
  <li>Perfect for testing and small personal projects</li>
</ul>

<h3 id="project-plan---15month">Project Plan - €15/month</h3>
<ul>
  <li>2,000 form submissions</li>
  <li>2,000 spam filters</li>
  <li>2,000 email notifications</li>
  <li>2,000 auto-responses</li>
  <li>2,000 integrations</li>
  <li>500MB file uploads</li>
  <li>Great for growing businesses and client projects</li>
</ul>

<h3 id="business-plan---50month">Business Plan - €50/month</h3>
<ul>
  <li>20,000 form submissions</li>
  <li>20,000 spam filters</li>
  <li>20,000 email notifications</li>
  <li>20,000 auto-responses</li>
  <li>20,000 integrations</li>
  <li>5000MB file uploads</li>
  <li>Perfect for high-volume applications</li>
</ul>

<h3 id="enterprise-plan---200month">Enterprise Plan - €200/month</h3>
<ul>
  <li>250,000 form submissions</li>
  <li>250,000 spam filters</li>
  <li>250,000 email notifications</li>
  <li>250,000 auto-responses</li>
  <li>250,000 integrations</li>
  <li>62500MB file uploads</li>
  <li>Built for large-scale enterprise applications</li>
</ul>

<h2 id="hybrid-billing-model">Hybrid Billing Model</h2>

<p>Your subscription provides generous monthly allowances, but if you exceed them, we automatically fall back to pay-as-you-go pricing using your account credits. This means you never lose form submissions - you just pay for the extra usage.</p>

<h2 id="referral-program-10-for-everyone">Referral Program: 10% for Everyone</h2>

<p>Our referral program rewards both you and your friends:</p>

<ul>
  <li>You earn**: 10% commission on your referral’s first payment</li>
  <li>They earn**: 10% bonus credit on their first payment</li>
  <li>Example**: Friend pays €15 for Project Plan → you get €1.50, they get €1.50 bonus</li>
</ul>

<h3 id="how-it-works">How It Works</h3>

<ol>
  <li>Get your code**: Visit your account dashboard to find your unique 8-character referral code</li>
  <li>Share**: Send friends your code or the generated signup link</li>
  <li>Earn together**: When they make their first payment, you both receive rewards</li>
</ol>

<p>Your referral dashboard shows total earnings, pending commissions, and referral history with payment status tracking.</p>

<h2 id="getting-started">Getting Started</h2>

<p><strong>Choose a plan</strong>: Visit our <a href="https://formshive.com/#/pricing">pricing page</a> to compare all subscription options.</p>

<p><strong>Manage subscriptions</strong>: Access your subscription dashboard to view usage, change plans, or manage billing through Stripe’s secure customer portal.</p>

<p><strong>Start referring</strong>: Generate your referral code and begin earning commissions while helping friends discover reliable form processing.</p>

<p>All payments are processed securely through Stripe, and you can upgrade, downgrade, or cancel your subscription anytime.</p>]]></content><author><name>Formshive Team</name><email>hello@formshive.com</email></author><category term="Release" /><category term="features" /><category term="subscriptions" /><category term="referrals" /><summary type="html"><![CDATA[TL;DR: Formshive now offers monthly subscription plans with generous allowances and a 10% referral program where both you and your referred friends earn rewards.]]></summary></entry><entry><title type="html">Auto-Response Lead Magnets: Collect Emails Before Sharing Resources</title><link href="https://blog.formshive.com/posts/auto-response-lead-magnets/" rel="alternate" type="text/html" title="Auto-Response Lead Magnets: Collect Emails Before Sharing Resources" /><published>2025-06-22T00:00:00+00:00</published><updated>2025-06-28T21:19:01+00:00</updated><id>https://blog.formshive.com/posts/auto-response-lead-magnets</id><content type="html" xml:base="https://blog.formshive.com/posts/auto-response-lead-magnets/"><![CDATA[<p>TL;DR: Use auto-response to create lead magnets - collect email addresses and details before providing access to downloads, courses, or premium content.</p>

<h2 id="lead-magnets-made-simple">Lead Magnets Made Simple</h2>

<p>Auto-response transforms your forms into powerful lead generation tools. Instead of giving away resources for free, collect valuable contact information first.</p>

<p>Here’s how it works:</p>

<ol>
  <li>Create a form asking for name, email, and relevant details</li>
  <li>Set up an auto-response with download links or access instructions</li>
  <li>Only people who submit the form get the resource</li>
</ol>

<h2 id="common-use-cases">Common Use Cases</h2>

<p><strong>Digital Downloads</strong></p>
<ul>
  <li>PDFs, eBooks, whitepapers</li>
  <li>Software downloads</li>
  <li>Template collections</li>
  <li>Stock photos or graphics</li>
</ul>

<p><strong>Educational Content</strong></p>
<ul>
  <li>Mini-courses via email</li>
  <li>Video tutorials</li>
  <li>Webinar access</li>
  <li>Exclusive content</li>
</ul>

<p><strong>Business Resources</strong></p>
<ul>
  <li>Pricing sheets</li>
  <li>Case studies</li>
  <li>Demo access</li>
  <li>Consultation bookings</li>
</ul>

<h2 id="example-pdf-download">Example: PDF Download</h2>

<p>Form fields:</p>
<pre><code>name: What's your name?
email: Email address
company: Company (optional)
use_case: How will you use this resource?
</code></pre>

<p>Auto-response message:</p>
<pre><code>Hi {{ name | "there" }},

Thanks for your interest! Here's your download link:

[Download PDF](https://example.com/secure-link)

This link expires in 7 days. Questions about {{ use_case | "implementation" }}? 
Just reply to this email.

Best,
The Team
</code></pre>

<h2 id="why-this-works">Why This Works</h2>

<ul>
  <li><strong>Qualified leads</strong>: People who want your content are genuinely interested</li>
  <li><strong>Permission marketing</strong>: They opted in to hear from you</li>
  <li><strong>Segmentation data</strong>: Use form responses to categorize contacts</li>
  <li><strong>Immediate value</strong>: They get what they want instantly</li>
</ul>

<h2 id="security-considerations">Security Considerations</h2>

<p>Auto-response requires captcha to prevent spam and ensure legitimate submissions. This protects both you and your visitors from automated abuse.</p>

<h2 id="getting-started">Getting Started</h2>

<ol>
  <li>Enable captcha in your form settings</li>
  <li>Add email notification recipients</li>
  <li>Create your lead magnet form</li>
  <li>Set up auto-response with download links</li>
  <li>Test the complete flow</li>
</ol>

<p>Auto-response makes lead generation effortless while providing immediate value to your visitors.</p>]]></content><author><name>Franz Geffke</name></author><category term="Use Cases" /><category term="Marketing" /><category term="features" /><category term="email" /><category term="automation" /><category term="examples" /><summary type="html"><![CDATA[TL;DR: Use auto-response to create lead magnets - collect email addresses and details before providing access to downloads, courses, or premium content.]]></summary></entry><entry><title type="html">TOML Form Specifications: A Developer’s Power Tool</title><link href="https://blog.formshive.com/posts/toml-form-specifications-for-developers/" rel="alternate" type="text/html" title="TOML Form Specifications: A Developer’s Power Tool" /><published>2025-06-22T00:00:00+00:00</published><updated>2025-06-28T21:19:01+00:00</updated><id>https://blog.formshive.com/posts/toml-form-specifications-for-developers</id><content type="html" xml:base="https://blog.formshive.com/posts/toml-form-specifications-for-developers/"><![CDATA[<p>TL;DR: TOML form specifications let you define forms as code - version control them, copy-paste between projects, and maintain consistent validation across your entire stack.</p>

<h2 id="code-first-form-definition">Code-First Form Definition</h2>

<p>While Formshive offers a visual form editor, the real power lies in TOML specifications. Think of them as configuration files for your forms - structured, version-controllable, and completely portable.</p>

<pre><code class="language-toml">[email]
name = 'email'
field = 'email'
label = 'Email Address'
required = true
is_email = true
on_fail = 'reject'

[message]
name = 'message'
field = 'textarea'
label = 'Your Message'
required = true
is_min = 10
check_spam = true
on_fail = 'spam'

[settings]
discard_additional_fields = true
</code></pre>

<h2 id="why-developers-love-toml-specs">Why Developers Love TOML Specs</h2>

<h3 id="version-control-ready">Version Control Ready</h3>
<p>Your forms live in code alongside your application:</p>
<pre><code class="language-bash">git add forms/contact-form.toml
git commit -m "add validation to contact form"
</code></pre>

<h3 id="copy-paste-between-forms">Copy-Paste Between Forms</h3>
<p>Need the same validation logic across multiple forms? Copy the TOML specification from one form and paste it into another form’s TOML editor.</p>

<h3 id="environment-consistency">Environment Consistency</h3>
<p>Same form configuration works across development, staging, and production.</p>

<h3 id="team-collaboration">Team Collaboration</h3>
<p>Review form changes in pull requests just like any other code.</p>

<h2 id="advanced-field-types">Advanced Field Types</h2>

<p>Modern web forms need more than just text fields:</p>

<pre><code class="language-toml">[phone]
name = 'phone'
field = 'tel'
label = 'Phone Number'
is_pattern = '^\\+?[1-9]\\d{1,14}$'
helptext = 'International format preferred'

[website]
name = 'website'
field = 'url'
label = 'Company Website'
is_url = true

[budget]
name = 'budget'
field = 'select'
label = 'Project Budget'
options = 'Under $5k,$5k-$25k,$25k-$100k,Over $100k'
required = true

[skills]
name = 'skills'
field = 'checkbox'
label = 'Technical Skills'
options = 'React,Vue,Angular,Node.js,Python,Go'
multiple = true

[event_date]
name = 'event_date'
field = 'datetime'
label = 'Event Date &amp; Time'
required = true
</code></pre>

<h2 id="validation-arsenal">Validation Arsenal</h2>

<h3 id="data-type-validation">Data Type Validation</h3>
<pre><code class="language-toml">[age]
name = 'age'
field = 'number'
is_min = 18
is_max = 120
on_fail = 'reject'

[username]
name = 'username'
field = 'text'
is_min = 3
is_max = 20
is_pattern = '^[a-zA-Z0-9_]+$'
</code></pre>

<h3 id="business-logic-validation">Business Logic Validation</h3>
<pre><code class="language-toml">[invite_code]
name = 'invite_code'
field = 'text'
is_in = 'BETA2025,LAUNCH2025,SPECIAL2025'
on_fail = 'reject'

[company_size]
name = 'company_size'
field = 'select'
options = '1-10,11-50,51-200,200+'
required = true
</code></pre>

<h3 id="smart-failure-handling">Smart Failure Handling</h3>
<p>Control what happens when validation fails:</p>
<ul>
  <li><code>pass</code> - Accept anyway (default)</li>
  <li><code>spam</code> - Mark as spam</li>
  <li><code>trash</code> - Move to trash</li>
  <li><code>reject</code> - Return HTTP 400 error</li>
</ul>

<h2 id="working-with-the-ui">Working with the UI</h2>

<h3 id="switching-to-toml-mode">Switching to TOML Mode</h3>
<ol>
  <li>Go to form settings</li>
  <li>Enable “Check Form Fields”</li>
  <li>Click the “TOML” tab</li>
  <li>Start typing your specification</li>
</ol>

<h3 id="template-shortcuts">Template Shortcuts</h3>
<p>Click “Prefill Example” to get a complete template with common field types and validation patterns.</p>

<h3 id="real-time-validation">Real-time Validation</h3>
<p>The UI validates your TOML syntax as you type, highlighting errors and providing specific feedback.</p>

<h2 id="production-integration">Production Integration</h2>

<h3 id="html-generation">HTML Generation</h3>
<p>Generate clean HTML forms from your specifications:</p>
<pre><code class="language-html">&lt;form action="https://api.formshive.com/v1/digest/your-form-id" method="POST"&gt;
  &lt;label for="email"&gt;Email Address&lt;/label&gt;
  &lt;input type="email" name="email" required /&gt;
  
  &lt;label for="message"&gt;Your Message&lt;/label&gt;
  &lt;textarea name="message" required minlength="10"&gt;&lt;/textarea&gt;
  
  &lt;button type="submit"&gt;Submit&lt;/button&gt;
&lt;/form&gt;
</code></pre>

<h3 id="api-testing">API Testing</h3>
<p>Get cURL commands for testing:</p>
<pre><code class="language-bash">curl -X POST \
  -d "email=test@example.com" \
  -d "message=Hello from the API" \
  https://api.formshive.com/v1/digest/your-form-id
</code></pre>

<h2 id="developer-workflow">Developer Workflow</h2>

<h3 id="local-development">Local Development</h3>
<ol>
  <li>Create TOML specifications in your editor</li>
  <li>Copy-paste into Formshive TOML editor</li>
  <li>Test using generated HTML and previews</li>
</ol>

<h3 id="team-workflow">Team Workflow</h3>
<ol>
  <li>Store TOML specs in your repository</li>
  <li>Review changes via pull requests</li>
  <li>Deploy to Formshive by copying from your repo</li>
</ol>

<h3 id="maintenance">Maintenance</h3>
<pre><code class="language-toml"># Update validation rules across all forms
[email]
name = 'email'
field = 'email'
required = true
is_email = true
on_fail = 'reject'  # Stricter validation in production
</code></pre>

<h2 id="getting-started">Getting Started</h2>

<ol>
  <li><strong>Create a form</strong> in Formshive</li>
  <li><strong>Enable form specifications</strong> in settings</li>
  <li><strong>Switch to TOML tab</strong> and start defining fields</li>
  <li><strong>Test with the HTML preview</strong></li>
  <li><strong>Copy specifications</strong> to your code repository</li>
</ol>

<p>Form specifications bridge the gap between visual form builders and code-first development, giving you the best of both worlds: developer control with production reliability.</p>]]></content><author><name>Franz Geffke</name></author><category term="How-To" /><category term="Developer" /><category term="features" /><category term="forms" /><category term="validation" /><category term="api" /><category term="tutorial" /><summary type="html"><![CDATA[TL;DR: TOML form specifications let you define forms as code - version control them, copy-paste between projects, and maintain consistent validation across your entire stack.]]></summary></entry><entry><title type="html">Understanding Form Fields: Why Structure Matters</title><link href="https://blog.formshive.com/posts/understanding-form-fields/" rel="alternate" type="text/html" title="Understanding Form Fields: Why Structure Matters" /><published>2025-06-22T00:00:00+00:00</published><updated>2025-06-28T21:19:01+00:00</updated><id>https://blog.formshive.com/posts/understanding-form-fields</id><content type="html" xml:base="https://blog.formshive.com/posts/understanding-form-fields/"><![CDATA[<p>TL;DR: Form fields are optional but powerful - they validate data, prevent spam, and generate HTML forms automatically.</p>

<h2 id="what-are-form-fields">What Are Form Fields?</h2>

<p>Think of form fields as a blueprint for your form. Without them, Formshive accepts whatever someone types and emails it to you. With form fields, you can specify exactly what information you want and how it should be handled.</p>

<p><strong>Without form fields:</strong></p>
<ul>
  <li>Someone fills out your form</li>
  <li>You get an email with whatever they typed</li>
  <li>No validation or structure</li>
</ul>

<p><strong>With form fields:</strong></p>
<ul>
  <li>You define what fields you expect (name, email, message, etc.)</li>
  <li>Formshive validates the data before accepting it</li>
  <li>You get structured, consistent responses</li>
  <li>Bonus: automatic HTML forms for embedding</li>
</ul>

<h2 id="why-use-form-fields">Why Use Form Fields?</h2>

<h3 id="data-quality">Data Quality</h3>
<p>Instead of getting messy, inconsistent responses, you get clean data:</p>

<p><strong>Without fields:</strong> <code>johndoe@gmailcom</code> (typo)
<strong>With email field:</strong> Form prevents submission</p>

<h3 id="spam-protection">Spam Protection</h3>
<p>Designate one field for spam checking:</p>
<pre><code>message: field = 'textarea', check_spam = true
</code></pre>
<p>Formshive automatically detects and filters suspicious content.</p>

<h3 id="required-fields">Required Fields</h3>
<p>Make sure you get the information you need:</p>
<ul>
  <li>Email addresses for follow-ups</li>
  <li>Phone numbers for urgent responses</li>
  <li>Company names for B2B leads</li>
</ul>

<h3 id="professional-forms">Professional Forms</h3>
<p>Generate proper HTML forms with labels, validation, and styling that you can embed anywhere.</p>

<h2 id="common-field-types">Common Field Types</h2>

<p><strong>Text Fields</strong></p>
<ul>
  <li>Name, company, job title</li>
  <li>Single-line responses</li>
</ul>

<p><strong>Email Fields</strong></p>
<ul>
  <li>Automatically validates email format</li>
  <li>Essential for auto-responses</li>
</ul>

<p><strong>Textarea</strong></p>
<ul>
  <li>Messages, comments, descriptions</li>
  <li>Multi-line text</li>
</ul>

<p><strong>Select Dropdown</strong></p>
<ul>
  <li>Budget ranges, service types</li>
  <li>Forces choices from your options</li>
</ul>

<p><strong>Number Fields</strong></p>
<ul>
  <li>Ages, quantities, ratings</li>
  <li>Validates numeric input with min/max limits</li>
</ul>

<h2 id="creating-form-fields">Creating Form Fields</h2>

<h3 id="visual-editor-recommended-for-beginners">Visual Editor (Recommended for Beginners)</h3>
<ol>
  <li>Go to your form settings</li>
  <li>Click “Form Fields” tab</li>
  <li>Add fields by clicking field type buttons</li>
  <li>Configure each field’s properties</li>
  <li>See live HTML preview</li>
</ol>

<h3 id="toml-code-for-advanced-users">TOML Code (For Advanced Users)</h3>
<pre><code class="language-toml">[name]
field = 'text'
label = 'Your Name'
required = true

[email]
field = 'text'
is_email = true
required = true

[budget]
field = 'select'
options = 'Under $1k,$1k-$5k,$5k-$10k,Over $10k'
</code></pre>

<h2 id="real-world-example">Real-World Example</h2>

<p><strong>Basic contact form without fields:</strong>
Someone types random text, you get messy emails.</p>

<p><strong>Structured contact form with fields:</strong></p>
<pre><code>Name: John Smith
Email: john@company.com  
Company: Acme Corp
Budget: $5k-$10k
Message: We need help with...
</code></pre>

<p>Clean, consistent, actionable data every time.</p>

<h2 id="getting-started">Getting Started</h2>

<p>Start simple:</p>
<ol>
  <li>Add name, email, and message fields</li>
  <li>Make email required for responses</li>
  <li>Enable spam checking on the message field</li>
  <li>Test your form</li>
</ol>

<p>You can always add more fields later as your needs grow.</p>

<p>Form fields transform chaotic form responses into organized, actionable data while protecting you from spam and ensuring you get the information you actually need.</p>]]></content><author><name>Franz Geffke</name></author><category term="How-To" /><category term="Validation" /><category term="features" /><category term="forms" /><category term="validation" /><category term="tutorial" /><summary type="html"><![CDATA[TL;DR: Form fields are optional but powerful - they validate data, prevent spam, and generate HTML forms automatically.]]></summary></entry><entry><title type="html">Auto-Response Feature</title><link href="https://blog.formshive.com/posts/auto-response/" rel="alternate" type="text/html" title="Auto-Response Feature" /><published>2025-06-16T00:00:00+00:00</published><updated>2025-06-28T21:19:01+00:00</updated><id>https://blog.formshive.com/posts/auto-response</id><content type="html" xml:base="https://blog.formshive.com/posts/auto-response/"><![CDATA[<p>TL;DR: Added auto-response feature to send personalized email replies to form submitters.</p>

<h2 id="auto-response">Auto-Response</h2>

<p>Auto-response is now available on Formshive:</p>

<ul>
  <li>Send automated, personalized emails to form submitters</li>
  <li>Use template variables like <code>{{ name }}</code> and <code>{{ email }}</code></li>
  <li>Requires captcha to be enabled for security</li>
  <li>Templates support fallback values: <code>{{ name | "there" }}</code></li>
</ul>

<h2 id="template-examples">Template Examples</h2>

<p>Simple greeting:</p>
<pre><code>Hello {{ name | "there" }}, thanks for your message!
</code></pre>

<p>Personalized response:</p>
<pre><code>Hi {{ name | "friend" }},

Thanks for contacting us about {{ subject | "our services" }}.
We'll respond to {{ email }} within 24 hours.

Best regards,
The Team
</code></pre>

<h2 id="security">Security</h2>

<ul>
  <li>Auto-responses only work when captcha is enabled</li>
  <li>This prevents spam and ensures legitimate submissions</li>
  <li>Templates are validated for security</li>
</ul>]]></content><author><name>Franz Geffke</name></author><category term="Release" /><category term="features" /><summary type="html"><![CDATA[TL;DR: Added auto-response feature to send personalized email replies to form submitters.]]></summary></entry><entry><title type="html">Formshive Now Speaks Your Language 🌍</title><link href="https://blog.formshive.com/posts/formshive-goes-global/" rel="alternate" type="text/html" title="Formshive Now Speaks Your Language 🌍" /><published>2025-06-08T00:00:00+00:00</published><updated>2025-06-28T21:19:01+00:00</updated><id>https://blog.formshive.com/posts/formshive-goes-global</id><content type="html" xml:base="https://blog.formshive.com/posts/formshive-goes-global/"><![CDATA[<p>We just rolled out a massive language update! Formshive is now available in <strong>7 languages</strong>:</p>

<ul>
  <li>🇬🇧 English</li>
  <li>🇩🇪 German</li>
  <li>🇫🇷 French</li>
  <li>🇪🇸 Spanish</li>
  <li>🇨🇳 Chinese (Simplified)</li>
  <li>🇧🇷 Portuguese (Brazilian)</li>
  <li>🇸🇦 Arabic</li>
</ul>

<h2 id="why-this-matters">Why This Matters</h2>

<p>Forms are personal. Whether you’re running a business in São Paulo, collecting feedback in Shanghai, or managing leads in Madrid - you should be able to do it in your language.</p>

<h2 id="getting-started">Getting Started</h2>

<p>Just hit the language selector in the navigation and pick your preferred language. Your choice gets saved automatically, so you won’t need to switch every time you visit.</p>

<p>Everything works exactly the same, just in the language that feels natural to you.</p>

<hr />

<p><em>Got a language request? Drop us a line at hello@formshive.com</em></p>]]></content><author><name>Franz Geffke</name></author><category term="Release" /><category term="features" /><summary type="html"><![CDATA[We just rolled out a massive language update! Formshive is now available in 7 languages:]]></summary></entry><entry><title type="html">Formshive WordPress Plugin: Embed Forms in Seconds</title><link href="https://blog.formshive.com/posts/wordpress-plugin/" rel="alternate" type="text/html" title="Formshive WordPress Plugin: Embed Forms in Seconds" /><published>2025-06-08T00:00:00+00:00</published><updated>2025-06-28T21:19:01+00:00</updated><id>https://blog.formshive.com/posts/wordpress-plugin</id><content type="html" xml:base="https://blog.formshive.com/posts/wordpress-plugin/"><![CDATA[<p>Formshive is coming to WordPress! Our brand new plugin is currently awaiting official approval, but you can download the ZIP and start using it today from <a href="https://github.com/franzos/formshive-wordpress/releases">https://github.com/franzos/formshive-wordpress/releases</a>.</p>

<h2 id="why-this-plugin-matters">Why This Plugin Matters</h2>

<p>Embedding forms on your WordPress site should be effortless. With our plugin, you can add any Formshive form to your pages or posts in just a few clicks—no coding required.</p>

<h2 id="key-features">Key Features</h2>

<ul>
  <li><strong>Form Embedding:</strong> Connect directly to the Formshive API and embed your existing forms anywhere on your site.</li>
  <li><strong>Admin Interface:</strong> Manage all your forms from a dedicated WordPress admin panel.</li>
  <li><strong>Shortcode Support:</strong> Use <code>[formshive id="123"]</code> to drop forms into posts, pages, or widgets.</li>
  <li><strong>Gutenberg Block:</strong> Enjoy a visual form embedding experience right in the block editor.</li>
  <li><strong>Framework Support:</strong> Choose your style—Formshive (default), Bootstrap, or Bulma CSS frameworks.</li>
  <li><strong>Multilingual:</strong> The plugin supports all Formshive languages out of the box.</li>
</ul>

<h2 id="getting-started">Getting Started</h2>

<ol>
  <li><a href="https://github.com/franzos/formshive-wordpress/releases">Download the plugin ZIP</a> and upload it to your WordPress site.</li>
  <li>Activate the plugin from your admin dashboard.</li>
  <li>Use the new Formshive menu to connect your account and start embedding forms.</li>
</ol>

<p>You can use shortcodes or the Gutenberg block to add forms anywhere you want. All your favorite Formshive features—validation, themes, and more—work seamlessly.</p>

<hr />

<p><em>Questions or feedback? Let us know at hello@formshive.com. Stay tuned for the official WordPress directory launch!</em></p>]]></content><author><name>Franz Geffke</name></author><category term="Release" /><category term="wordpress" /><category term="plugin" /><category term="features" /><summary type="html"><![CDATA[Formshive is coming to WordPress! Our brand new plugin is currently awaiting official approval, but you can download the ZIP and start using it today from https://github.com/franzos/formshive-wordpress/releases.]]></summary></entry><entry><title type="html">New Form Editor</title><link href="https://blog.formshive.com/posts/new-form-editor/" rel="alternate" type="text/html" title="New Form Editor" /><published>2025-06-04T00:00:00+00:00</published><updated>2025-06-28T21:19:01+00:00</updated><id>https://blog.formshive.com/posts/new-form-editor</id><content type="html" xml:base="https://blog.formshive.com/posts/new-form-editor/"><![CDATA[<p>TL;DR: Massively improved usability, added embedded forms and form-links.</p>

<h2 id="visual-form-editor">Visual Form Editor</h2>

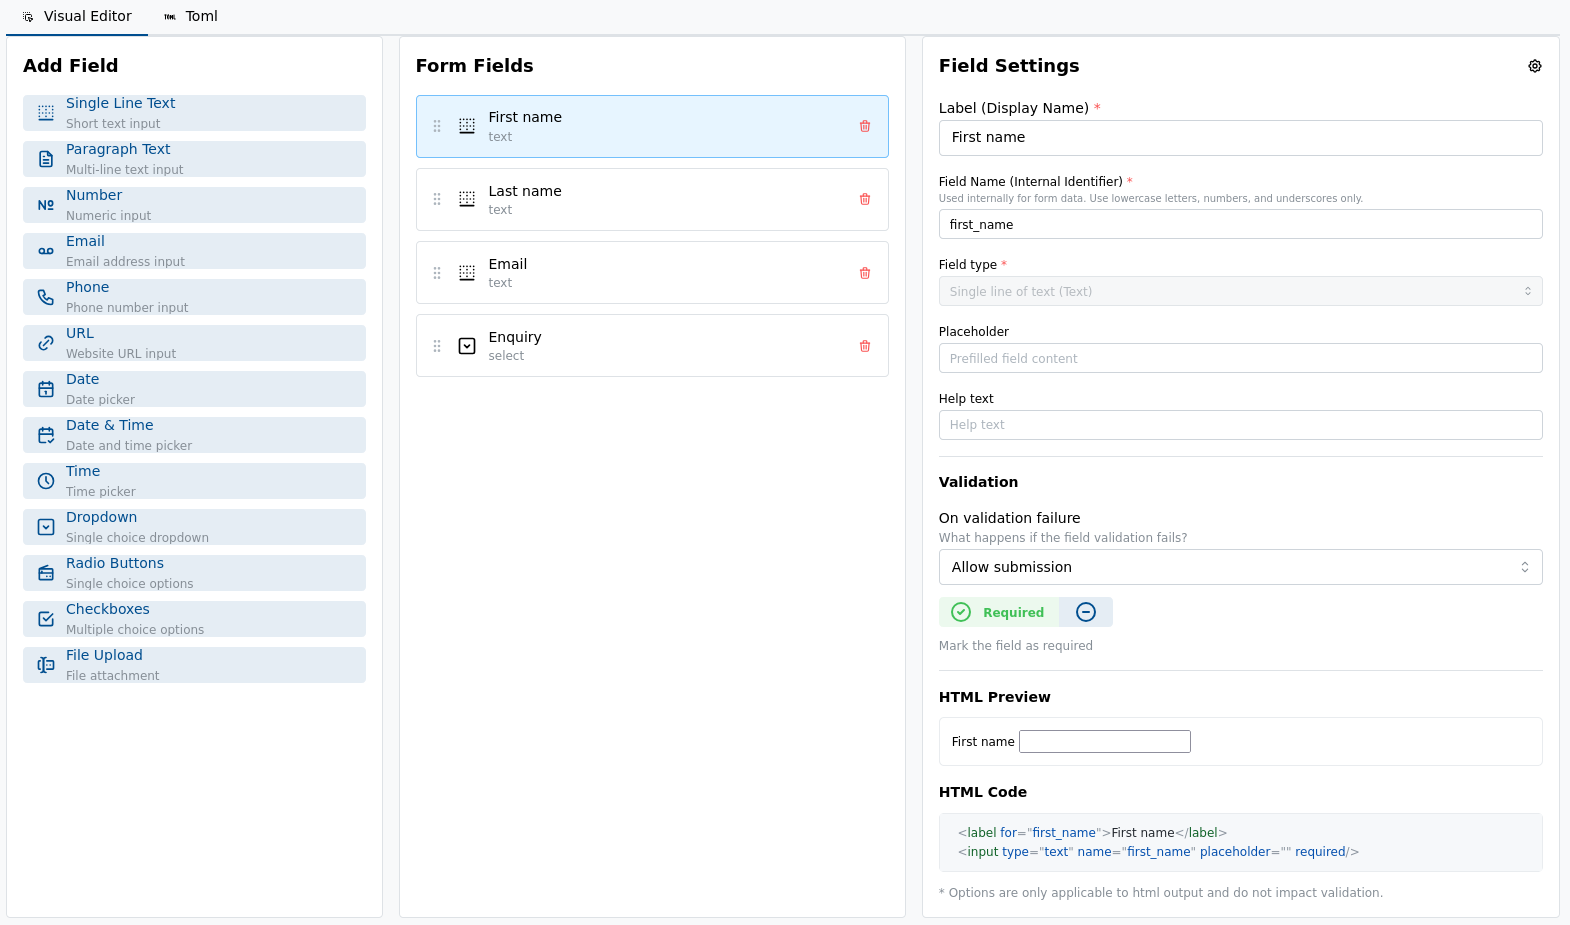
<p>We’re happy to introduce our new, much simplified Visual Editor!</p>

<p>What changes:</p>
<ul>
  <li>There’s new fields for Email, Phone number and Url</li>
  <li>You can easily re-arrange fields</li>
  <li>The 3-column layout gives you a better overview</li>
</ul>

<p><img src="/assets/images/2025-06-04-new-form-editor.png" alt="Formshive - Revised Form Editor" /></p>

<p>We hope this makes it easier to create and edit forms, especially for new users.</p>]]></content><author><name>Franz Geffke</name></author><category term="Release" /><category term="features" /><summary type="html"><![CDATA[TL;DR: Massively improved usability, added embedded forms and form-links.]]></summary></entry><entry><title type="html">Rusty Forms becomes Formshive</title><link href="https://blog.formshive.com/posts/rusty-forms-becomes-formshive/" rel="alternate" type="text/html" title="Rusty Forms becomes Formshive" /><published>2025-06-03T00:00:00+00:00</published><updated>2025-06-28T21:19:01+00:00</updated><id>https://blog.formshive.com/posts/rusty-forms-becomes-formshive</id><content type="html" xml:base="https://blog.formshive.com/posts/rusty-forms-becomes-formshive/"><![CDATA[<p>TL;DR: Rebrand from Rusty Forms to Formshive, with a new name and logo.</p>

<h2 id="rebranding">Rebranding</h2>

<p>We’re excited to announce our rebrand from Rusty Forms to <strong>Formshive</strong>!</p>

<p>We think of your forms as a hive of activity, where data is collected, sorted and forwarded as needed.
This inspired us to create a new name and logo that reflects this idea.</p>

<h2 id="changes">Changes</h2>

<p>For now, there’s nothing you have to do; Everything will continue to work as before.</p>

<p>For new forms:</p>
<ul>
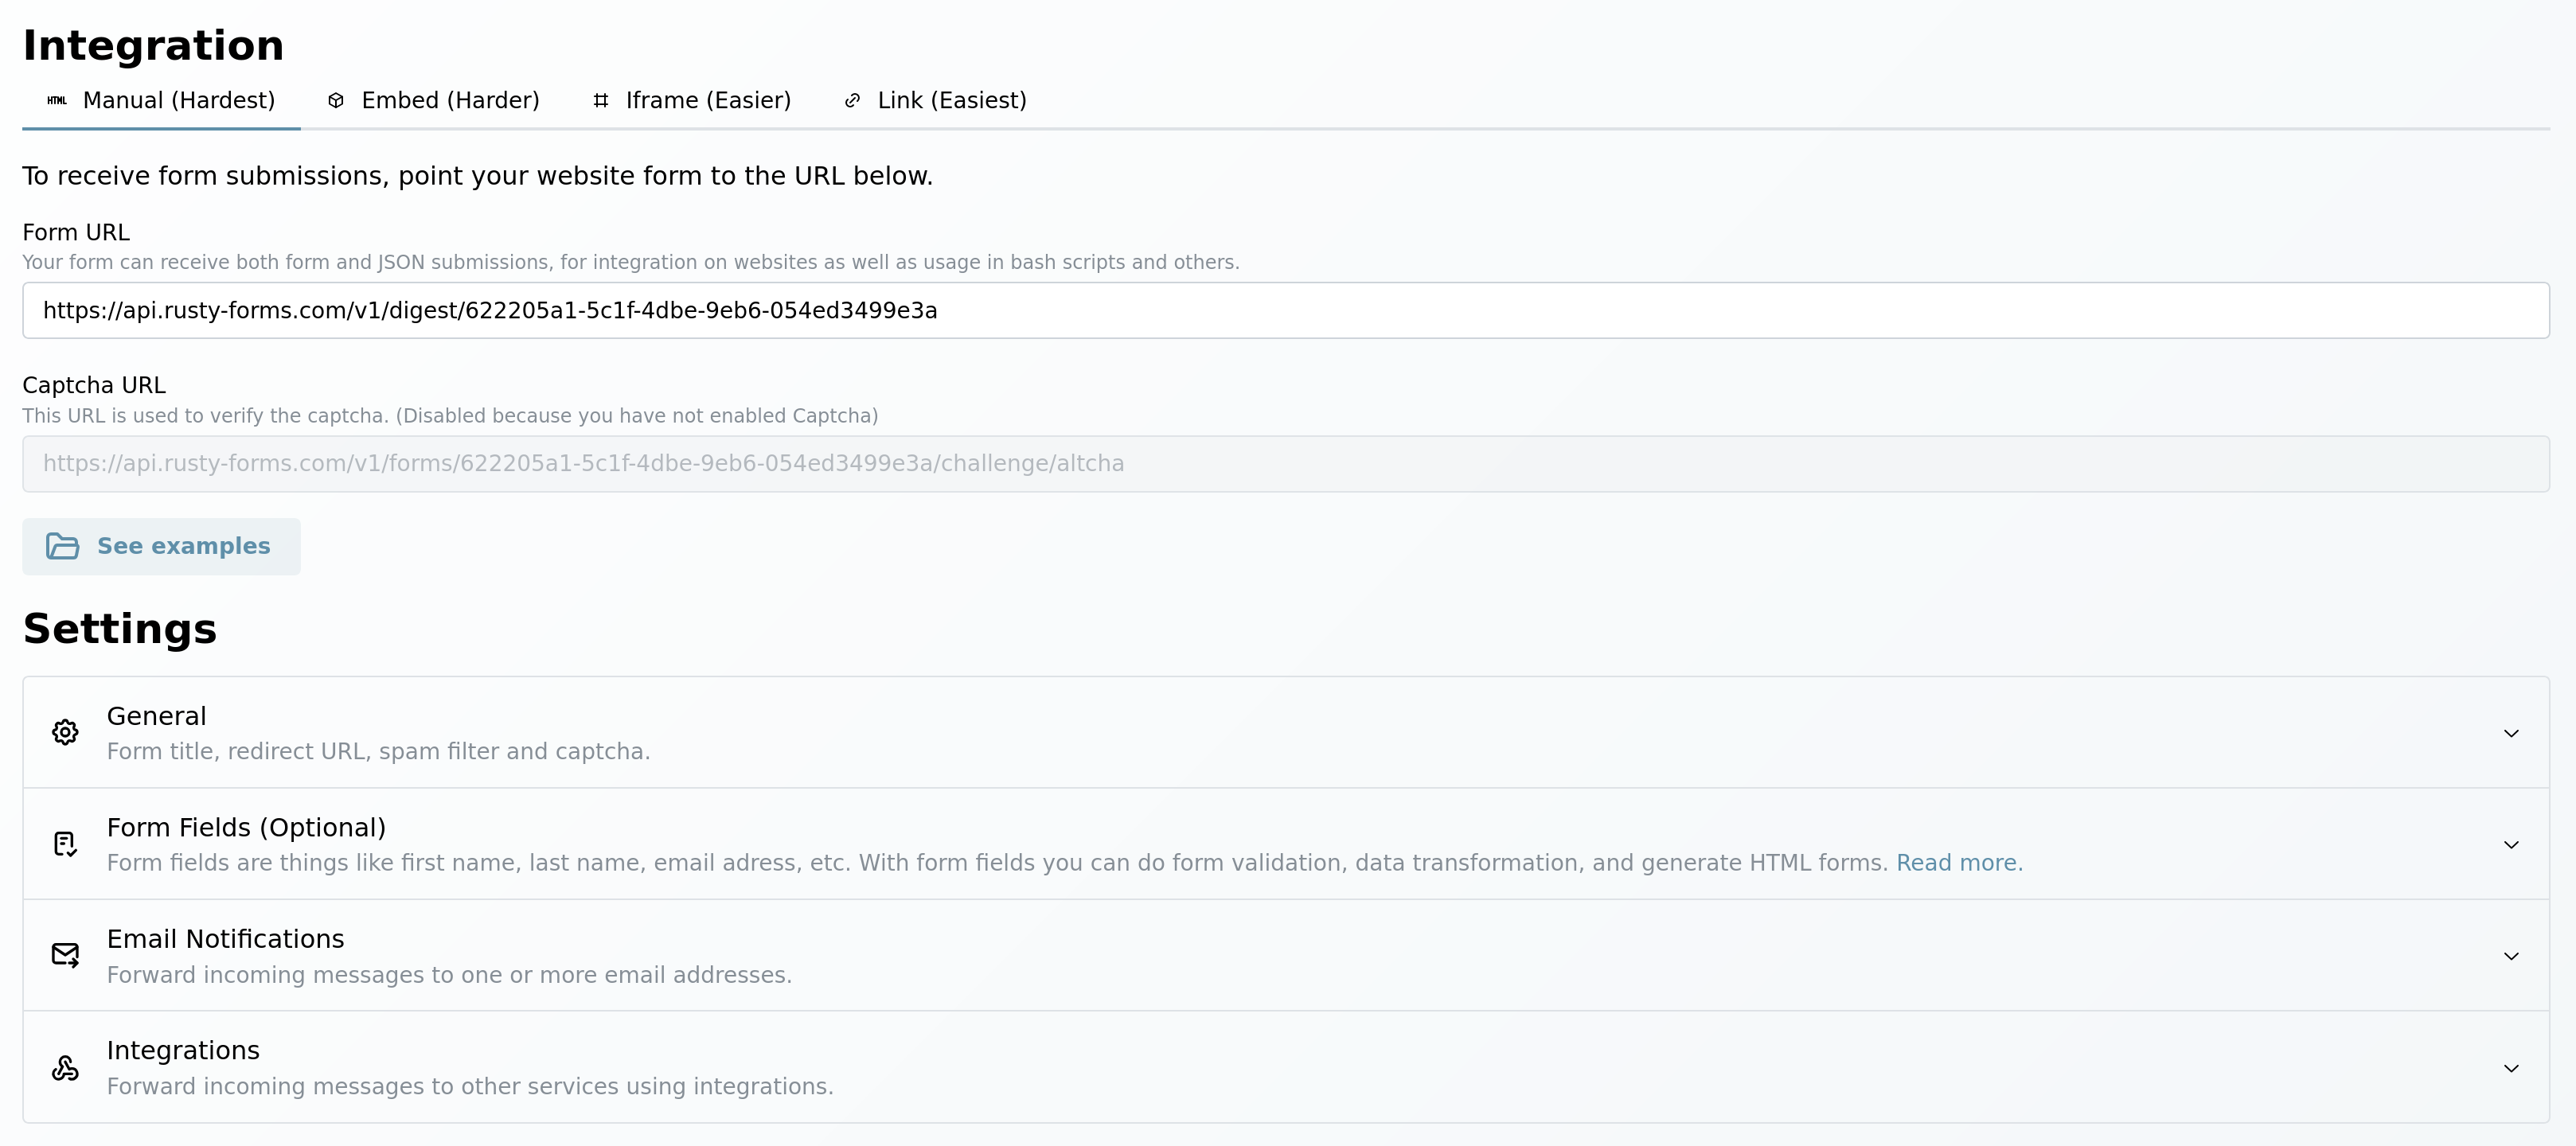
  <li>The website URL will change from <code>https://rusty-forms.com</code> to <code>https://formshive.com</code></li>
  <li>The form URL will change from <code>https://api.rusty-forms.com</code> to <code>https://api.formshive.com</code></li>
</ul>

<p>Emails now come from <code>support@formshive.cm</code>, so please update your email filters accordingly.</p>]]></content><author><name>Franz Geffke</name></author><category term="Release" /><category term="features" /><summary type="html"><![CDATA[TL;DR: Rebrand from Rusty Forms to Formshive, with a new name and logo.]]></summary></entry><entry><title type="html">May Release</title><link href="https://blog.formshive.com/posts/may-release/" rel="alternate" type="text/html" title="May Release" /><published>2025-05-14T00:00:00+00:00</published><updated>2025-06-28T21:19:01+00:00</updated><id>https://blog.formshive.com/posts/may-release</id><content type="html" xml:base="https://blog.formshive.com/posts/may-release/"><![CDATA[<p>TL;DR: Massively improved usability, added embedded forms and form-links.</p>

<h2 id="usability-improvements">Usability Improvements</h2>

<p>Easier login and new color scheme.</p>

<ul>
  <li>Confusing phrases like “Magic link” are now “Email link”</li>
  <li>The new color scheme is more consistent and easier on the eyes</li>
</ul>

<h2 id="new-settings-page">New Settings Page</h2>

<p>Formshive comes with a lot of features, and striking the balance between making it accessible to novices, and powerful for experts can be tricky. Clearer wording, better tooltips, and a improved layout should help with that.</p>

<p><img src="/assets/images/2025-05-15-may-release-form-page.png" alt="Formshive - Revised Form Settings" /></p>

<ul>
  <li>Totally re-worked the forms page</li>
  <li>New option to embed forms (via iframe, with script, or as link)</li>
  <li>Embedded forms can be blank, or themed with Bulma or Bootstrap</li>
  <li>Adding new form fields is easier now (with clear description what field types mean)</li>
  <li>Fields with multiple options are easier to edit</li>
</ul>

<p><img src="/assets/images/2025-05-15-may-release-form-page-multiple-options.png" alt="Formshive - Revised Fields with Multiple Options" /></p>

<p>Editing form fields is still confusing the first time, but improvements are coming soon.</p>]]></content><author><name>Franz Geffke</name></author><category term="Release" /><category term="features" /><summary type="html"><![CDATA[TL;DR: Massively improved usability, added embedded forms and form-links.]]></summary></entry></feed>